With my high speed ziggo connection (200 mbit down and 20 mbit up) it’s very attractive to not spend dollars in Dropbox. So I created our own cloud.
Tool: Owncloud
Setup is very easy. I’ve installed some server. This server can be as tiny as an raspberry pi, it can be some synology. But I build my own nas (An old itx case, an Asrock Q1900dc-itx mainboard, with 4gib memory, 2x2TB Western Digital hard disks (Raid 1) and a sata laptopdrive for booting the machine with running Ubuntu server 14.04.3 lts).
Software needed is: Apache, MySql (MariaDb) and Php (better knows as LAMP). This was already installed during installation of the Ubuntu server. So now I only had to install the Owncloud packages. And even that is just as easy as adding some repository to the apt run an update en do apt-get install owncloud. Actually it’s just as boring as installing everything in Ubuntu.
After this installation open a webbrowser. type in the name of your server with owncloud as urn. In my case:
Oh I forgot. The hard part is: setup an owncloud mysql database and user. You can use phpMyAdmin for that or just the mysql prompt:
$CREATE DATABASE owncloud;
$CREATE USER owncloud IDENTIFIED BY ‘[some very complicated password]’;
$GRANT ALL PRIVILEGES ON owncloud.* TO owncloud;
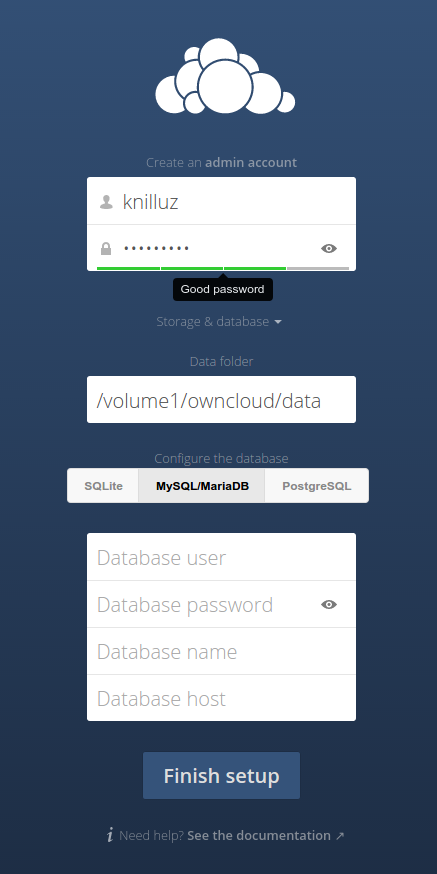
NOW the owncloud setup can start (open the previous mentioned owncloud url in your browser) and do some setup:
Ok, the only thing different from default is my data location, that is on the second mounted disk (/volume1). Create a directory owncloud data. And give that data dir www-data read-write privileges (sudo chmod www-data:www-data owncloud -R). The setup is no more than this: create an admin user, set the data folder and enter the mysql credentials.
Now the own cloud has been created.
Install clients for windows, mac,s linux, android, ithings.
I wish you a happy clouding.

